CMA Template Management: Guide for Admins and Marketing
This guide is for admins and marketing managers who set up and maintain CMA templates for their agents. It covers the three types of CMA page, when to use each, how to lock your branding, and how to roll templates out to a branch so agents start from a near-finished product.
The three types of CMA page
Every page in a CMA falls into one of three types. Knowing which is which tells you what you can change and how.
Customisable pages — fully editable in the Page Builder. Most template work happens here. You can also let agents edit selected elements on these pages.
Data pages — populated automatically from the subject property, such as property details and comparable sales. These can't be edited in the Page Builder; layout changes need Relab's development team.
PDF pages — static PDFs uploaded as pages. Nothing to design or edit: upload, and replace when the content changes.
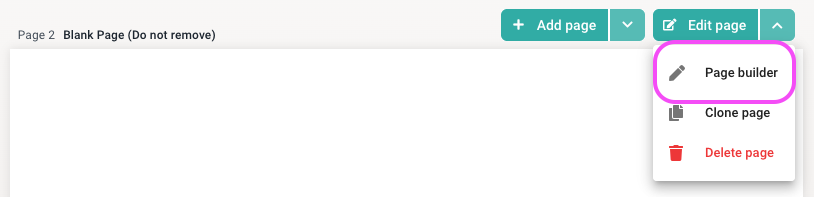
To tell them apart, open a page in the CMA editor. Customisable pages show a Page Builder button at the top; data pages don't.
Working with PDF pages
PDF pages suit content that doesn't change per property, such as marketing schedules, monthly statistics, and brand filler pages.
In the CMA editor, click Upload PDF.
Select the PDF from your computer. It appears as a new page in the left-hand panel.
To rename the page, edit the name in the left-hand panel and click the tick to save.
If this replaces an older version, delete the old page from the panel.

Always remove the outdated page after uploading its replacement, so agents don't use last month's stats or an old marketing schedule by mistake.
Editing pages in the Page Builder
The Page Builder is a simplified design tool built for CMA pages. You can add and edit text boxes (font, size, colour, line height, spacing), move and resize elements, upload images and PDFs as assets, add shapes and overlays, and copy pages between templates. For a full tour of the tools, see Getting started with Page Builder.
Design elsewhere, then import
The Page Builder isn't a full design tool, so don't build complex pages from scratch. Instead:
Design the page in your usual tool, such as Canva or InDesign.
Export it as a PDF or image.
In the Page Builder, import it as the page background.
Add text boxes, dynamic fields, and other editable elements on top.
You get a polished, on-brand page without fighting the tool.
Reusing pages instead of rebuilding them
Within the same template — use Clone Page. For example, clone the client letter to make a two-agent version.
Across templates — open the page in the Page Builder and click Copy Page Content. Open the other template, click Add a New Page, open the Page Builder, and click Paste Page Content. Opening the second template in another browser window makes this quicker.
Controlling what agents can edit
For every element on a customisable page, you decide whether agents can change it in their own CMAs. This is how you protect your branding while leaving room for personal touches.
Open the page in the Page Builder and select the element.
Find the Editable checkbox.
Untick it to lock the element. Tick it to let agents click the element and edit it in their CMA.
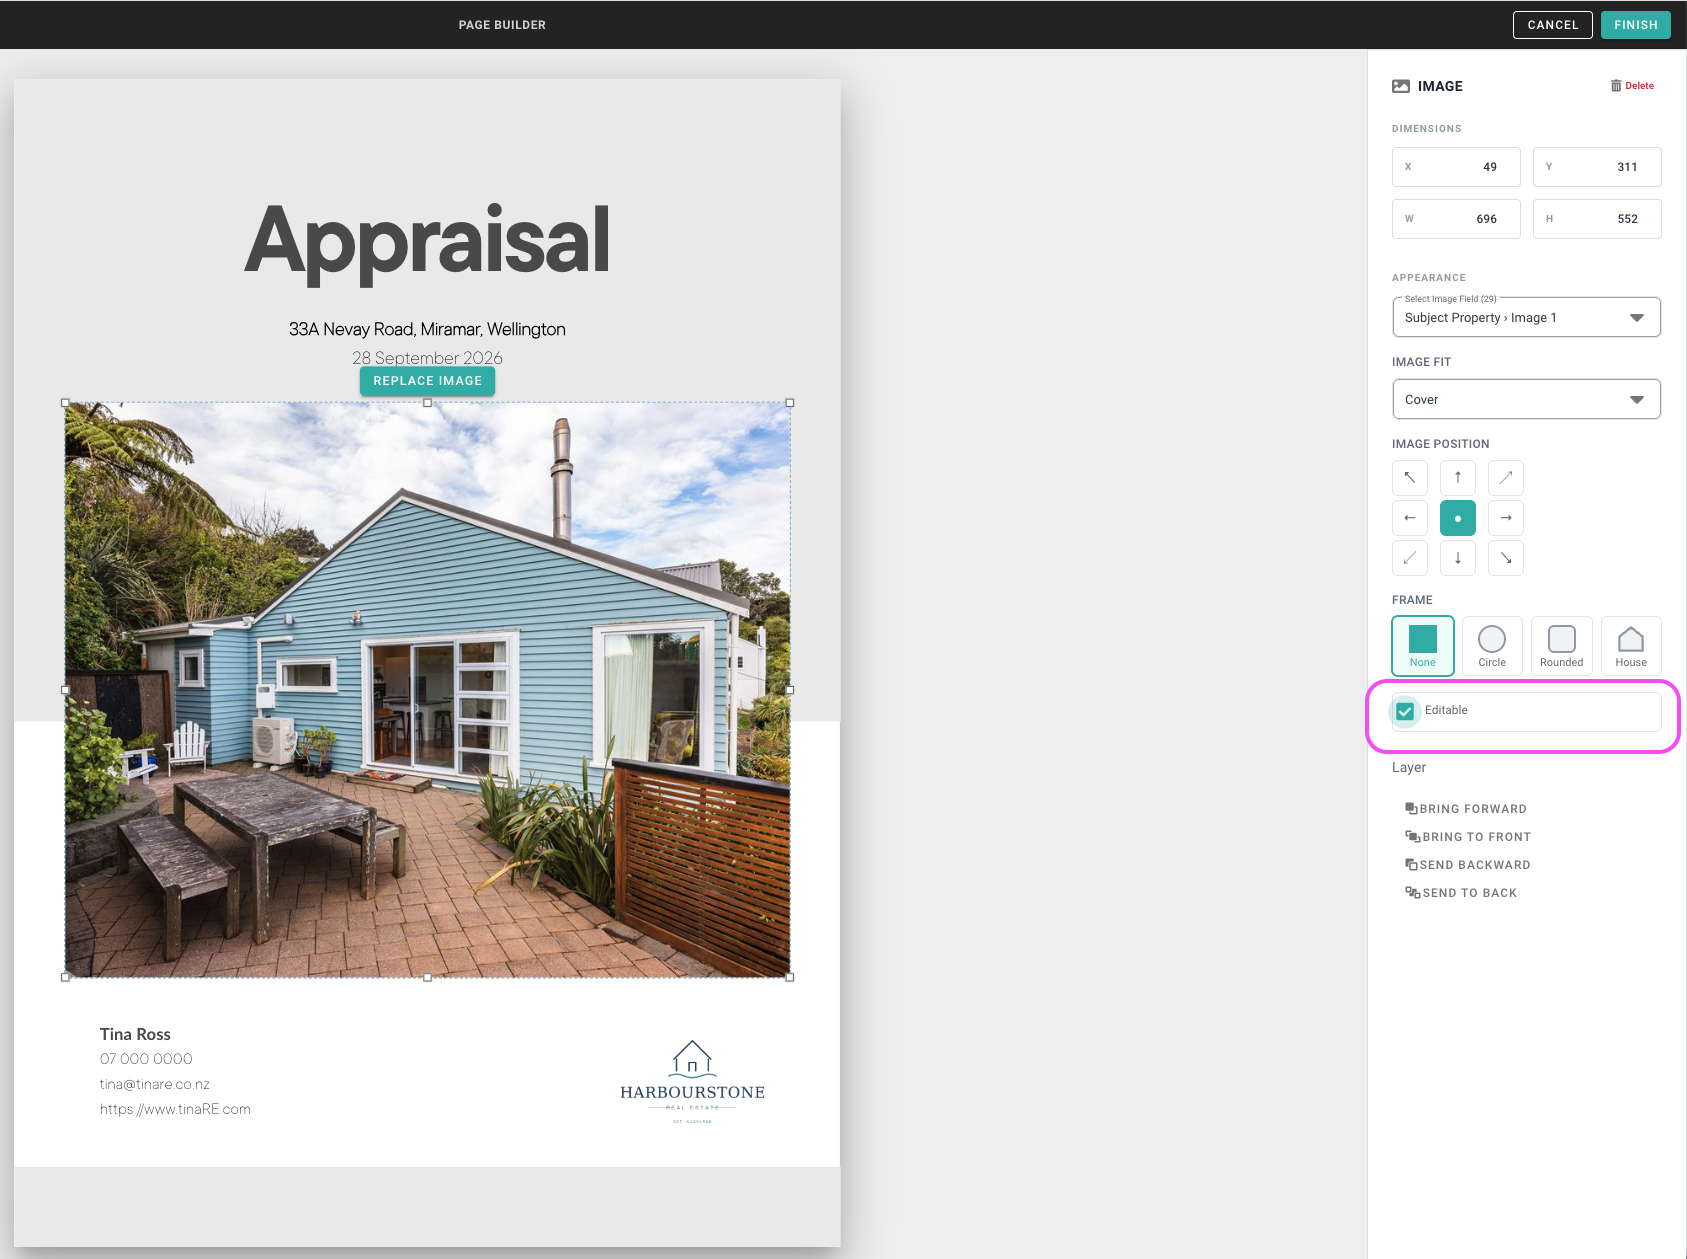
Lock logos, banners, and header images so they can't be overwritten. Only unlock elements where agent input adds value, such as a personal bio or contact details.
Quick edit or full toolbar
For text boxes agents can edit, choose how much control they get: [VERIFY: option labels]
Quick edit — agents can change the text but not the formatting.
Show toolbar — agents can also change font size, bold, and other formatting.
Use Show toolbar sparingly. It's useful where text length varies, such as a marketing calendar, but turned on everywhere it lets agents change fonts and break consistency.
Using dynamic fields
Dynamic fields fill in details automatically from the agent's profile, the subject property, and system data such as today's date, so agents don't retype them for every CMA.
Click into any text box.
Type @ to open the list of dynamic fields. Each field shows a preview of its value for the current property.
Click a field to insert it.
For more details, see CMA Dynamic Text Fields.
Dynamic images
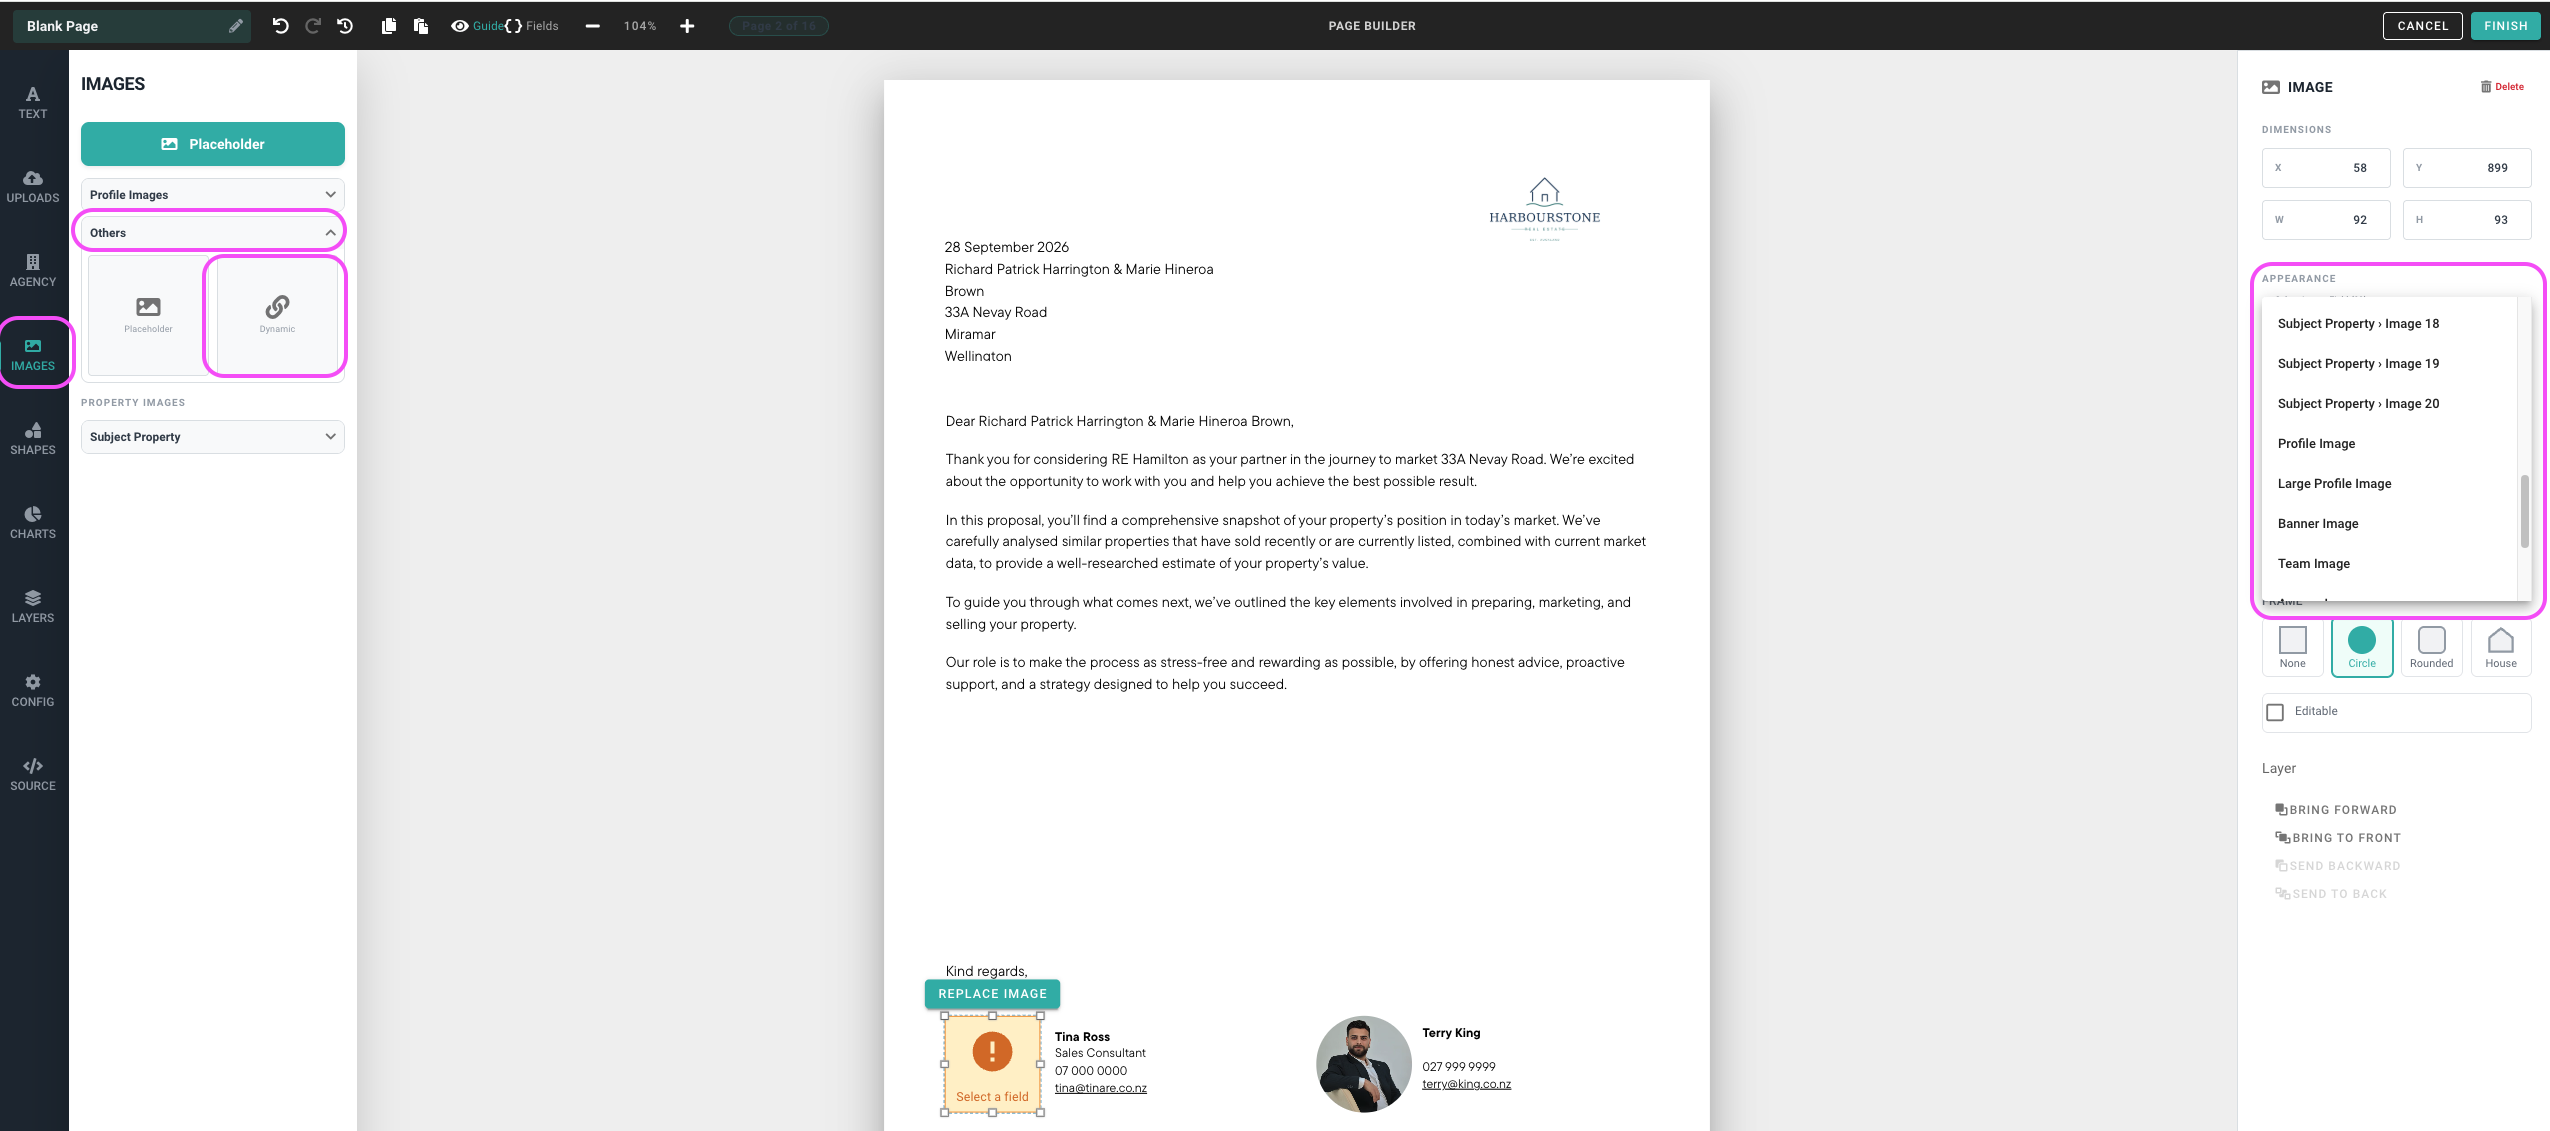
Images can be dynamic too. When you add an image element in the Page Builder, choose its source (agent image, subject property image, comparable property image etc.)
Dynamic image pulls automatically from a set field; this is different to a placeholder image (an empty image box the agent or admin fills in).
Select Images
Others
Dynamic
Appearance (dropdown) choose the field the dynamic image will adopt
Where to save templates
Where you save a template decides who can use it.
Franchise Template — visible to every agent in the Franchise (a Franchise is a group of Branches). Save your master template here as the starting point for agents.
Branch Templates — visible to every agent in the branch. Save your master template here as the starting point for agents.
My Templates — visible only to the individual agent. Agents save their personalised versions here, and admins can save directly into an agent's My Templates.
Setting up a branch or franchise template
Build and finalise the master template with all standard pages. Preview it before saving.
Select Save as New Template and save it as a Branch Template or Franchise Template
Each agent opens the branch or franchise template and personalises it: reordering pages, turning pages on or off, and choosing single- or dual-agent versions.
The agent saves their version under My Templates, with a clear name such as "Residential" or "Lifestyle".
Saving a template to an agent's account
In Templates, click Load by Branch Member and select the agent.
Make your changes.
Click Save as New Template, choose Branch Member, name the template, and save.
The template appears in that agent's My Templates. This always creates a new template rather than overwriting one. If you're replacing an outdated template, archive the old one so the agent can still get to it if needed.
For permissions and multi-branch setups, see Managing Team CMA Templates.
Keeping branches consistent
If you're rolling templates out across several branches, and the branch templates are similar or the same, save as a Franchise template.
Key reminders
Design complex pages in Canva or InDesign and import them, especially if they are static pages. Don't build them from scratch in the Page Builder.
Designs can also be added as background images in the Page Builder.
Lock brand elements such as logos and header images.
Use dynamic fields wherever you can.
When updating an agent's template, save a new template and archive the old one rather than overwriting.
Next steps
Getting started with Page Builder — a tour of every Page Builder tool
Adding Branded Headers and Footers — apply consistent branding to new pages
Managing Team CMA Templates — permissions, template types, and multiple branches
CMA Dynamic Text Fields — every available field
❓ FAQs
Why can't I open the Page Builder on some pages?
Those are data pages, filled automatically from the subject property. Their layout can't be edited in the Page Builder. Contact support@relab.co.nz if you need a change.
Why is an agent's headshot blank in their CMA?
The image is dynamic and pulls from their profile. Ask the agent to upload a headshot to their CMA Agent Profile.
Will saving a template to an agent's account overwrite what they have?
No. It creates a new template in their My Templates. Archive the old one if it's no longer needed.
Can Relab help build a specific page?
Yes. Contact support@relab.co.nz and our team can help.
Last updated: 28 September 2026